No stress tips for starting and growing your own vegetable garden.
The thought of trying to grow our own food used to intimidate me until so many
of you helpful readers gave me a bunch of tips years ago.
Since then I have learned it really doesn’t need to take much time or effort
to grow your own garden! Even as a beginner, you’ll get a wonderful harvest if
you follow just a few simple steps.
I planted my first vegetable garden nearly 15 years ago, and since then I’ve
had one in the ground many times over the years. Some years life has just been
too busy to get it going, and it’s been a few since I had one planted.
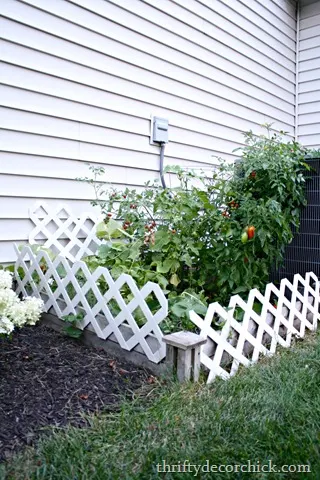
Up till recently I’ve used the very basic 4×4 beds you can buy at most
hardware stores:
This post may contain affiliate links for
your convenience.
I may earn a small commission when you make a purchase through links.
I found those trellis pieces by a dumpster and used them to keep little
critters out. It definitely helped!
I also think having the garden right next to the noisy air conditioner
helped deter the wildlife.
cedar raised garden beds
are super easy to put together and a perfect for a beginner! You can buy
multiples to make bigger gardens as well.
The problem with these garden kits is the wood is very thin, so even though
it’s cedar and should hold up well, I found they were only last a few years
at best.
They are fairly inexpensive (as far as raised beds go), so not a huge deal.
They are GREAT option if you’re just starting out.
my kit together (you’ll need a drill and screws) and then dump garden soil
inside.
That’s it! No landscaping fabric, no extra steps…just soil and plants. And
I always got a fruitful crop of veggies and strawberries.
The first few times I built vegetable gardens, I didn’t even remove the
grass underneath. I piled the soil on and it was never an issue.
Using a raised garden (instead of planting directly into the ground) makes
it possible to experience the joy of growing your own food without a ton of
work.
There’s no need to clear away weeds and grass, till your dirt, create
borders, etc. A wood or metal raised garden can go almost anywhere and gives
you so much flexibility!
This time I wanted it to be a more permanent, and it worked out perfectly
because last summer we got rid of a big trampoline we had in the corner of
our backyard.
It was already cleared out and landscape fabric was put down before the
rocks:
So we have a large area back there that has plenty of room for a few garden
beds.
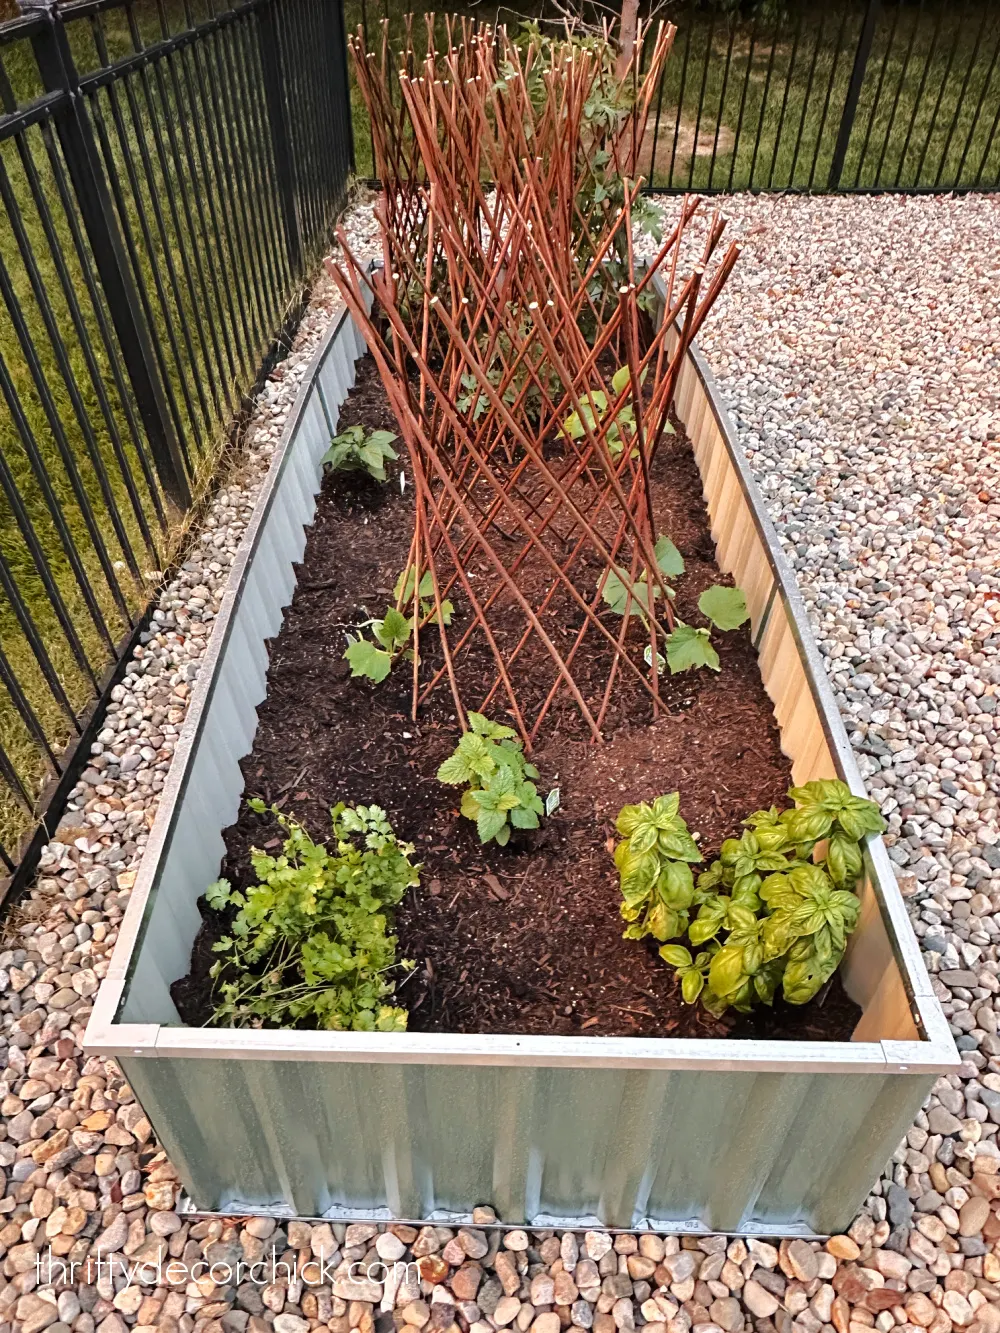
garden bed this time. This
King Bird garden bed
is 36 by 101 inches and 18 inches tall. They have bunch of sizes and heights
available.
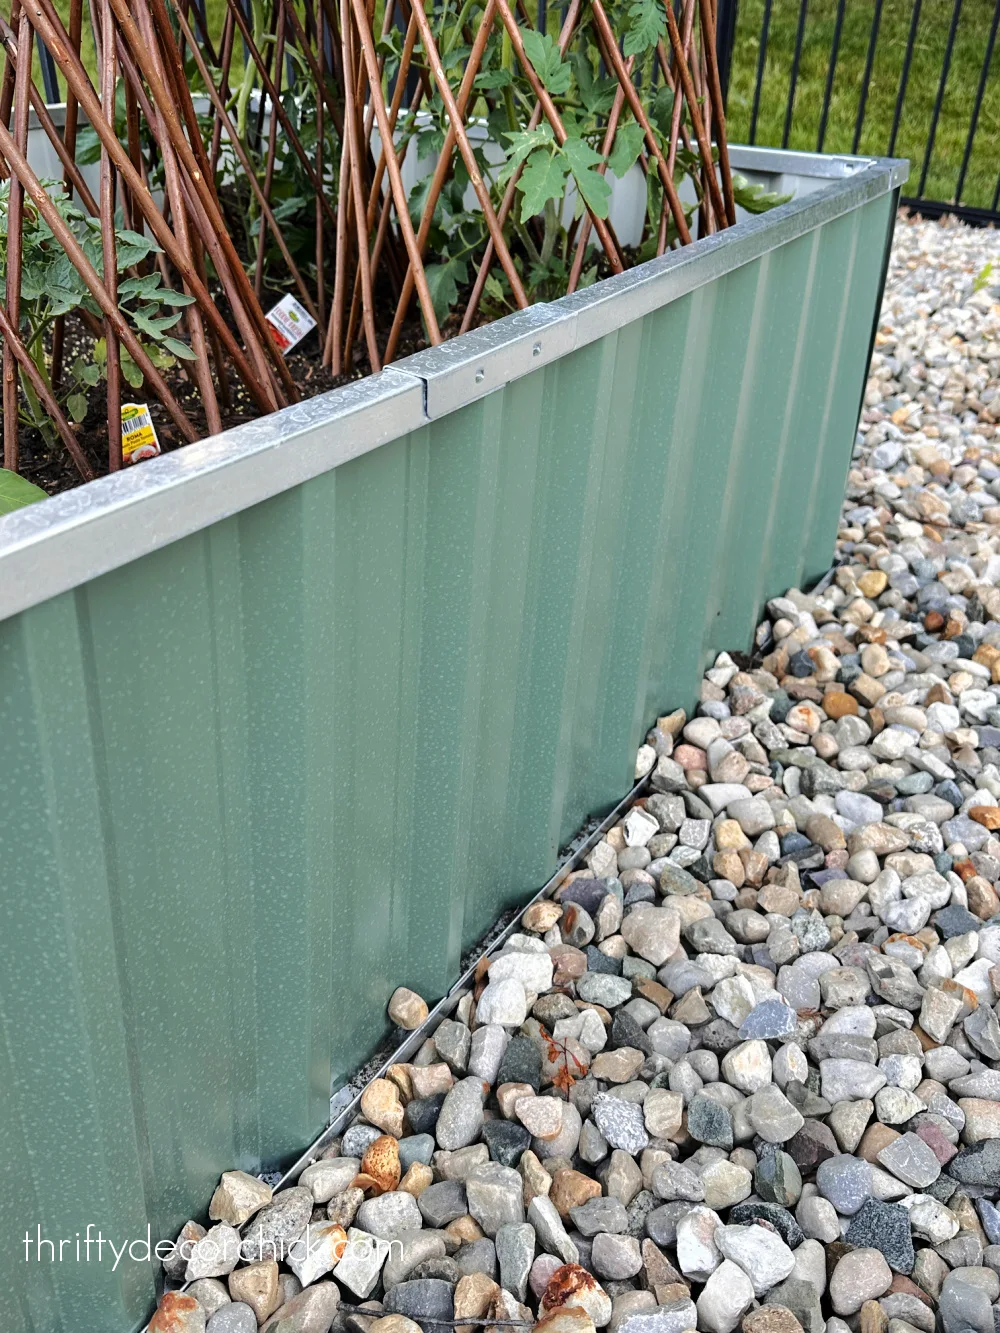
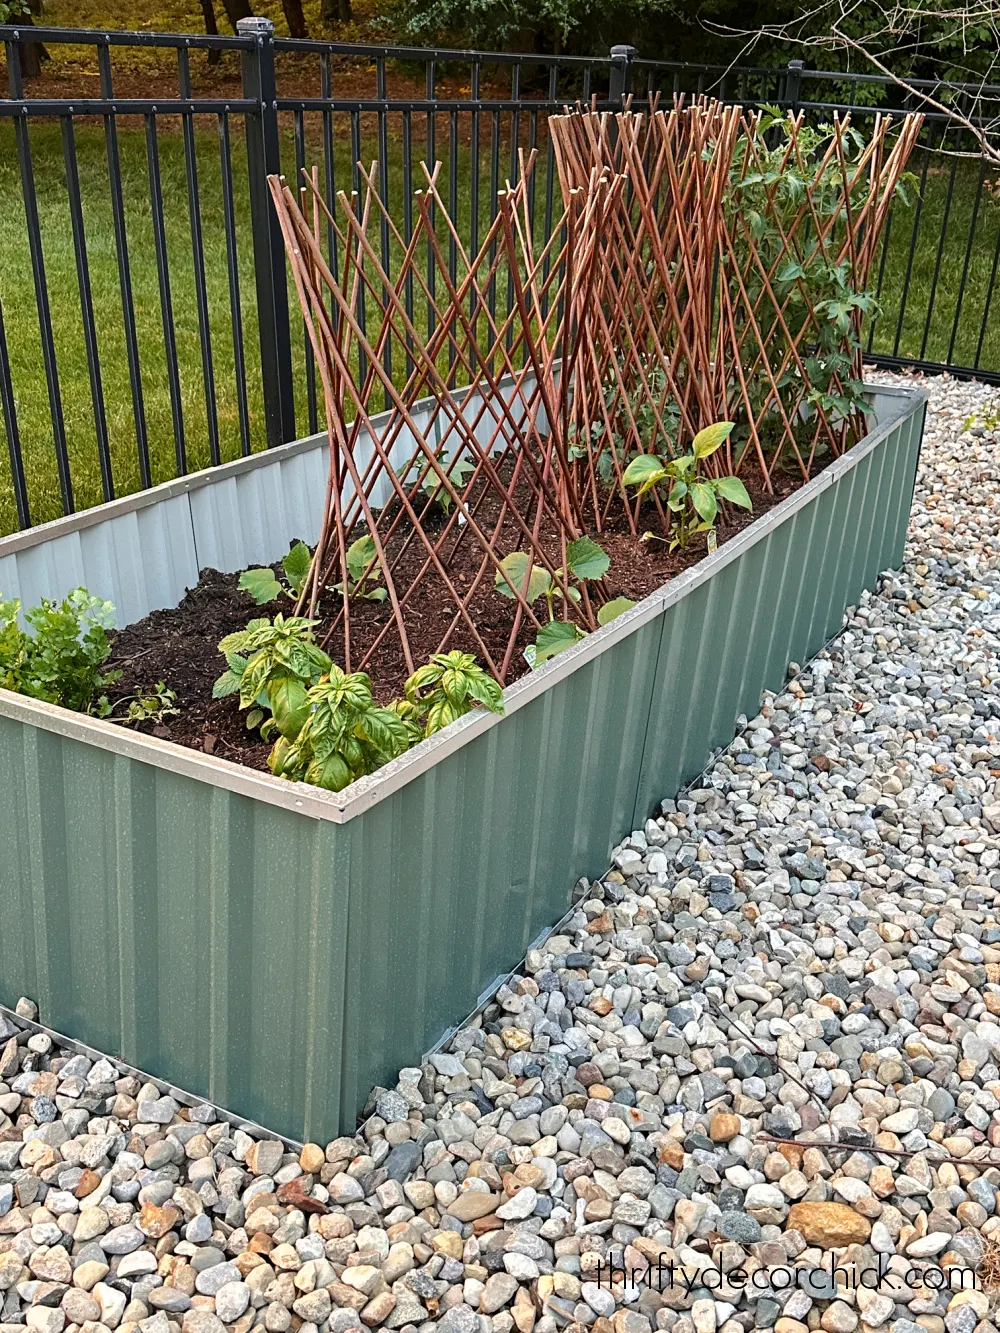
It’s made of galvanized steel, so should hold up much better to the
elements:
I love the green color!
It was very simple to put together and comes with plenty of extra corner
pieces so you can make this larger one into two smaller garden beds.
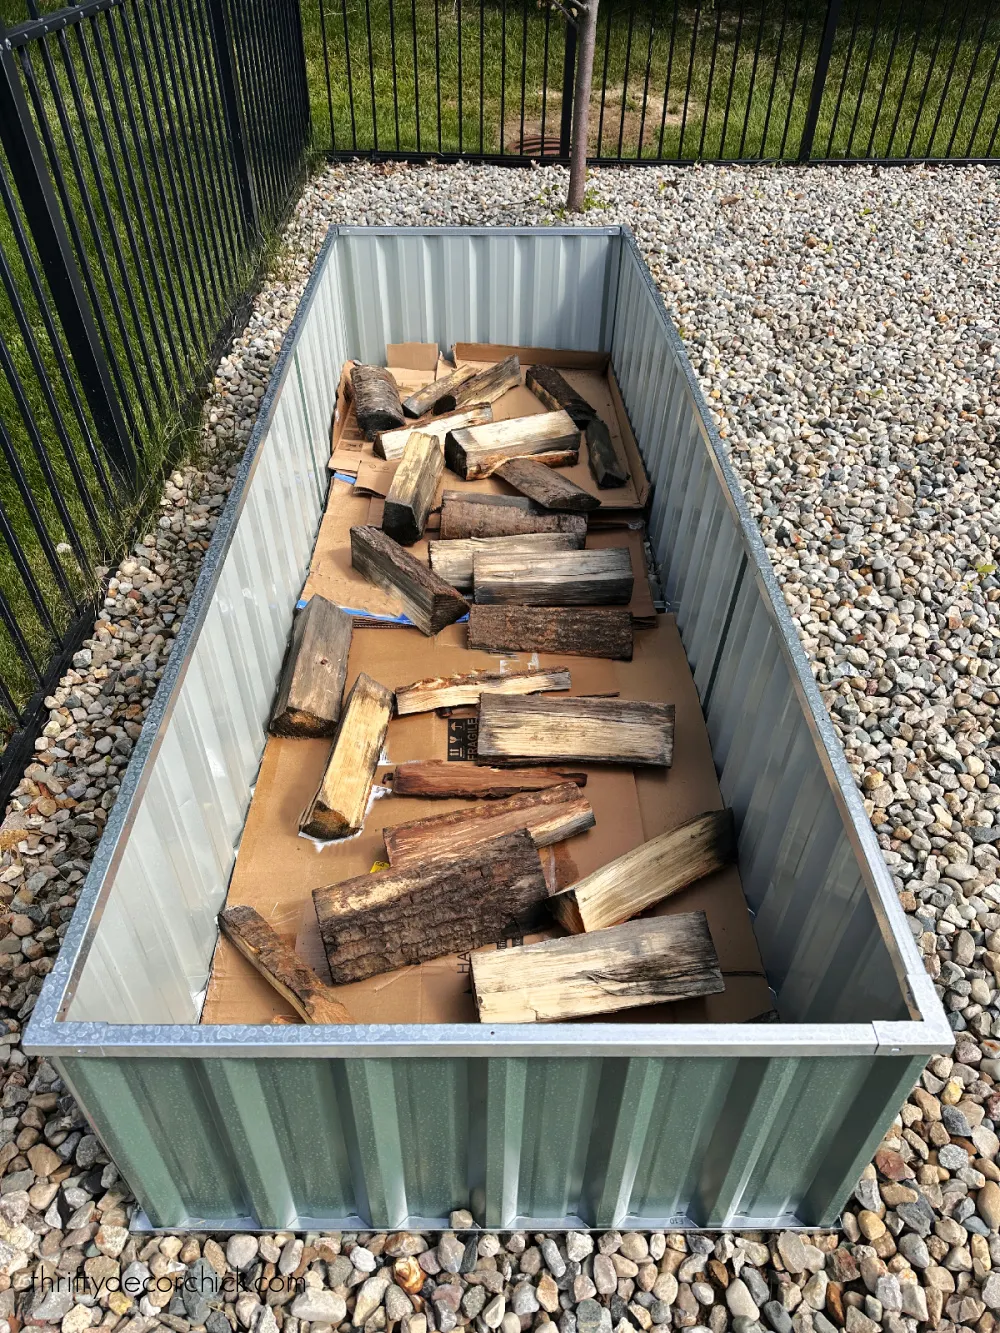
Because this is such a huge bed, I wanted to use whatever I could to fill it
in a bit before adding soil. I used cardboard shipping boxes to cover the
bottom, then took some old firewood and spread them out on top:
This is called hugelkultur, and as the wood breaks down, it creates
healthier soil over time. Because this bed will stay put, the soil will only
get better year to year.
You can also fill your raised garden beds with branches, twigs, leaves and
grass clippings. Another trick I use for my beds is to use inexpensive
topsoil for the bottom of the bed, and then rich, more expensive garden soil
on top.
With smaller raised garden beds (like I mentioned early in this post),
the extra filler is not needed. I would just use soil to fill
them.
I used 15 bags of top soil and seven bags of Miracle-Gro soil on top to fill
my long raised garden.
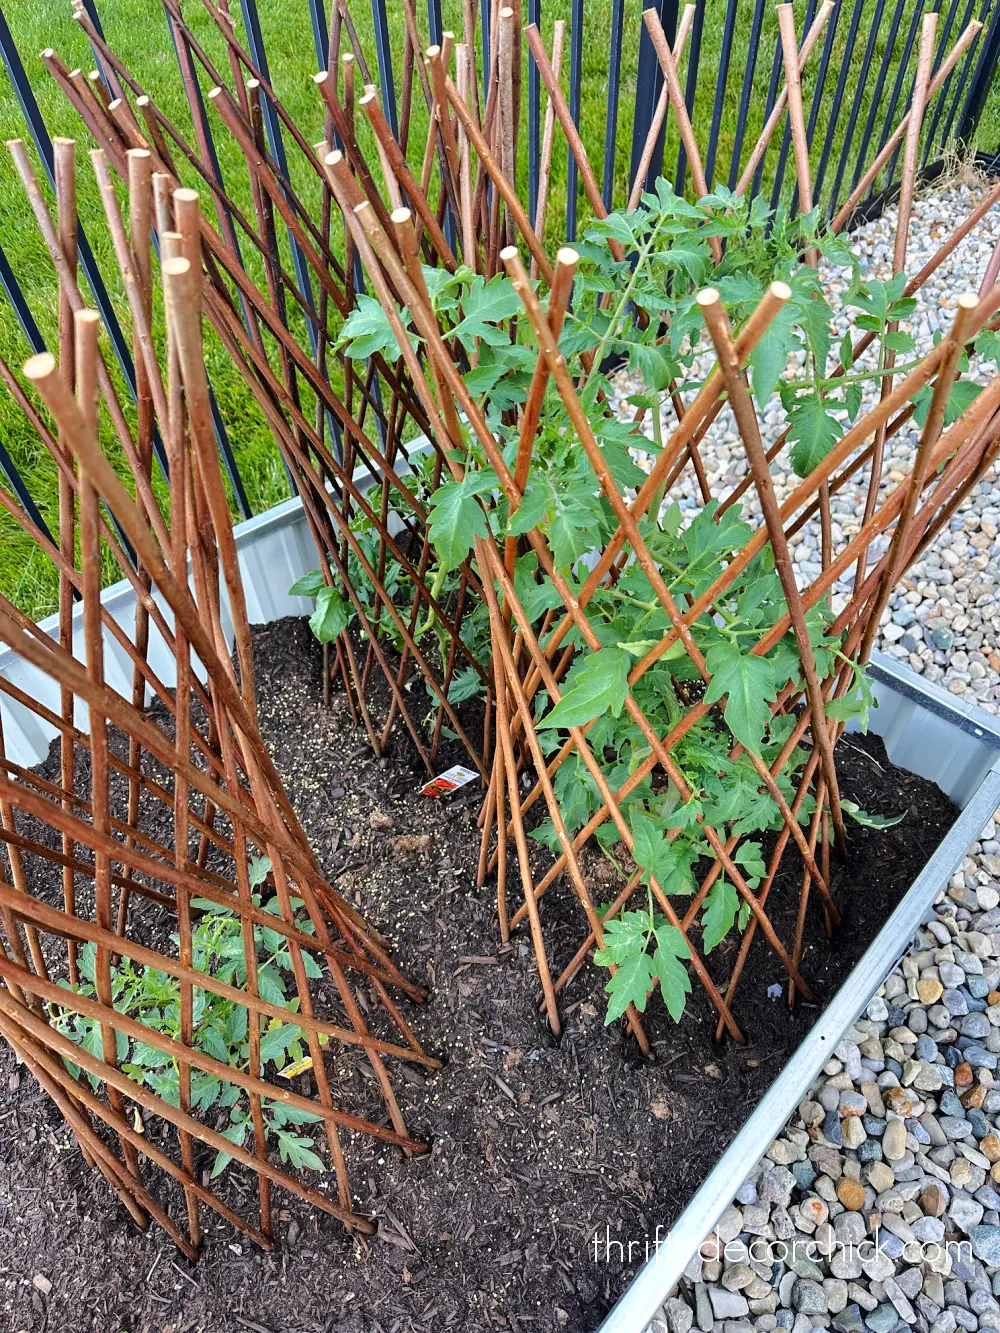
I ordered these beautiful willow expandable trellises years ago and was so
excited to finally pull them out!:
Not only are they pretty, but they are helpful support for plants like
tomatoes. I used one for my beefsteak, Roma and sandwich tomato plants.
These are sturdier than the then wire tomato cages I’ve always used.
I also placed one in between my cucumber plants. Cukes tend to vine out
everywhere, so this will give them something to grab onto and go up instead
of out. (I’ll have to help them along, we’ll see how it works!)
Here are a few more vegetable gardening tips I’ve learned over the
years:
-
I’ve had gardens in full sun and morning sun, and the full sun gardens
tend to produce more. -
Strawberries can be planted in the ground, but overall they do better in
containers. They get better air circulation and can be kept away from
pests. -
Play around with your spacing, as you don’t want to overcrowd. But
you’ll be surprised at how much you can fit in a small garden! I
recommend
the square foot gardening technique
if you’re a beginner. I shared
my experience as a newbie gardener
more than ten years ago. -
It’s not recommended to plant a shallow raised garden on top of rocks
because they tend to hold moisture instead of letting it drain properly.
I did my best to remove what was inside the metal bed, but it was hard
work! I’ve since read that it isn’t a concern as much for taller garden
beds like mine. -
The taller the bed, the less pests you’re likely to get. It’s also
easier on the back to have the beds as high as possible. If you’re just
starting out,
these raised beds on legs
are perfect! -
Vining plants like cucumbers, melons and pumpkins will expand all over
the place, so giving them something like a trellis to climb keeps them
off the ground and taking over. (Melons are heavier and will need
additional support eventually.) -
After planting, give your plants plenty of water. Then you can slow down
to two to three times a week depending on your climate. -
I find as long as I get most of the plants in the ground by June, I have
plenty of produce all summer long and into the fall. - My first few years I never used fertilizer and still got a ton of food from the gardens. Now I fertilize every month or so during the growing season.
I’d like to add two more of these raised beds next year. My plan is to do
one with earlier bloomers like lettuce in one, and later produce like
pumpkins in another. That way I separate them and won’t have to plant
everything at once.
I’d also love to create a cut flower garden as well! How fun would that
be?
I will add more soil to my current bed next year — this will settle a bit
and I will probably raise the soil level up a few inches.
I’m surprised that the metal walls aren’t bowing out more from the large
amount of soil:
The left is bowing a little bit, but overall I’m extremely pleased with this
raised bed!
As with so many home projects, planting your own garden doesn’t have to be a
big laborious thing, especially for your first time. You don’t have to be an
expert to start your own vegetable garden!
I find it so relaxing to tend to the plants. Seeing them grow and then
eating your own delicious produce is so rewarding.
Do you have more helpful tips or recommendations? Please feel free to add
them in the comments.

